1. Create sender page, Use your html editor to create the blank page. Insert following the code to anywhere between the <BODY> start and end tags.
<object CLASSID="clsid:5220cb21-c88d-11cf-b347-00aa00a28331" width="14" height="14">
<param NAME="LPKPath" VALUE="VideoChatSender.lpk">
</object>
<p>
<object classid="clsid:9DA66AFA-F784-426A-82F6-7DD754C1A039" id="VideoChatSender1" width="355" height="319" CODEBASE ="http://www.viscomsoft.com/webdemo/videochatsender.cab">
<param name="_Version" value="65536">
<param name="_ExtentX" value="10795">
<param name="_ExtentY" value="9208">
<param name="_StockProps" value="0">
<param name="LicenseKey" value="Demo">
<param name="VideoFormat" value="0">
<param name="SendAudioStream" value="1">
<param name="SendVideoStream" value="1">
<param name="AudioComplexity" value="0">
<param name="VideoBitrate" value="10000">
<param name="FrameRate" value="15">
<param name="AudioQuality" value="8">
<param name="AudioDevice" value="0">
<param name="VideoDevice" value="0">
<param name="EchoCanceler" value="0">
<param name="ConferenceNumber" value="0">
<param name="ConferenceUserID" value="0">
</object>
</p>
2. You may resize the video chat sender window, change the width and height properties. On the CODEBASE attribute it point to our demo version videochatsender.cab file. If you bought full version. you should upload your cab file to your web server and change the CODEBASE attribute point to your cab file.
3. Add video device, audio device, video format combo box , ip address , Conference Number, Conference UserID textbox, connect button. Insert following the code after </object> tags.
<p>Video Device
<select size="1" name="cbovideodevice">
</select></p>
<p>Audio Device
<select size="1" name="cboaudiodevice">
</select></p>
<p>Video Format
<select size="1" name="cbovideoformat">
<option value='0'>160x120</option>
<option value='1'>176x144</option>
<option value='2'>320x240</option>
<option value='3'>352x288</option>
<option value='4'>640x480</option>
</select></p> Video Bitrate <input TYPE="Text" Name="txtVideoBitrate" Value="128000" size="15"> <br><br>
Enter the Server IP Address
<input TYPE="Text" Name="txtIPAddress" Value="127.0.0.1" size="15"> Port No. <input TYPE="Text" Name="txtPortNo" Value="1234" size="5">
Enter the Conference Number
<input TYPE="Text" Name="txtConfNumber" Value="5000" size="15"> User ID <input TYPE="Text" Name="txtUserID" Value="10000" size="5"> <input TYPE="BUTTON" Name="btnConnect" Value="Connect" onClick="MyConnect()">
4. Now you need add video devices to combo box and handle Connect button. Insert following the code to anywhere between the <BODY> start and end tags, save the page as sender.html.
Now it use videoformat 160x120, you may change the videoformat property if you need high quality.
<body ONLOAD="MyInit()">
<SCRIPT LANGUAGE="JavaScript">
function MyInit()
{
ivideodevicecount = VideoChatSender1.GetVideoDeviceCount()
for(i=0;i <ivideodevicecount;i++)
cbovideodevice.options[i]=new Option(VideoChatSender1.GetVideoDeviceName(i),1)
iaudiodevicecount = VideoChatSender1.GetAudioDeviceCount()
for(i=0;i <iaudiodevicecount;i++)
cboaudiodevice.options[i]=new Option(VideoChatSender1.GetAudioDeviceName(i),1)
}
function MyConnect()
{
VideoChatSender1.VideoDevice=cbovideodevice.selectedIndex
VideoChatSender1.AudioDevice=cboaudiodevice.selectedIndex
VideoChatSender1.VideoFormat =cbovideoformat.options[cbovideoformat.selectedIndex].value
VideoChatSender1.FrameRate=25
VideoChatSender1.VideoBitrate=txtVideoBitrate.value
VideoChatSender1.ConferenceNumber=txtConfNumber.value
VideoChatSender1.ConferenceUserID=txtUserID.value
VideoChatSender1.AudioComplexity=0
VideoChatSender1.AudioQuality=8
VideoChatSender1.SendVideoStream=1
VideoChatSender1.SendAudioStream=1
iResult=VideoChatSender1.Connect(txtIPAddress.value,txtPortNo.value)
}
</script>
5. Create receiver page, Use your html editor to create the blank page. Insert following the code to anywhere between the <BODY> start and end tags.
<object CLASSID="clsid:5220cb21-c88d-11cf-b347-00aa00a28331" width="14" height="14">
<param NAME="LPKPath" VALUE="VideoChatReceiver.lpk">
</object>
<object classid="clsid:7DD8AFB4-618D-4067-981A-9345DF0AFCF8" id="VideoChatReceiver1" width="467" height="373" CODEBASE ="http://www.viscomsoft.com/webdemo/videochatpro/videochatreceiver.cab">
<param name="_Version" value="65536">
<param name="_ExtentX" value="12356">
<param name="_ExtentY" value="9869">
<param name="_StockProps" value="0">
<param name="EchoCanceler" value="0">
<param name="LicenseKey" value="Demo">
<param name="ConferenceNumber" value="0">
<param name="ConferenceUserID" value="0">
<param name="CaptureMode" value="0">
</object>
</p>
6. You may resize the video chat receiver window, change the width and height properties. On the CODEBASE attribute it point to our demo version videochatreceiver.cab. If you bought full version. you should upload your cab file to your web server and change the CODEBASE attribute point to your cab file.
7. Add Listen From Server IP Address , Conference Number, Conference UserID textbox, Listening button. Insert following the code after </object> tags.
Listen From Server IP Address
<input TYPE="Text" Name="txtIPAddress" Value="127.0.0.1" size="15"> Port No. <input TYPE="Text" Name="txtPortNo" Value="1234" size="5">
Conference Number
<input TYPE="Text" Name="txtConfNumber" Value="5000" size="15"> User ID <input TYPE="Text" Name="txtConfUserID" Value="10000" size="5"> <input TYPE="BUTTON" Name="btnListen" Value="Start Listening" onClick="MyListen()">
8. Now you need handle Listening button. Insert following the code to anywhere between the <BODY> start and end tags, save the page as receiver.html
<SCRIPT LANGUAGE="JavaScript">
function MyListen()
{
VideoChatReceiver1.ReceiveVideoStream =1
VideoChatReceiver1.ReceiveAudioStream =1
VideoChatReceiver1.ConferenceNumber =txtConfNumber.value
VideoChatReceiver1.ConferenceUserID =txtConfUserID.value
iResult=VideoChatReceiver1.Listen(txtIPAddress.value,txtPortNo.value)
}
</script>
9. Now the following steps show you how to testing sender.htm and receiver.htm. Now you need prepare three computers (Computer A, Computer B, Computer C), these computers connected network.
On computer C, launching the videochatprosetup.exe and installed it. then run Server.exe, For Computer A and Computer B does not need installed videochatprosetup.exe. It will download the activex when you open the web page.
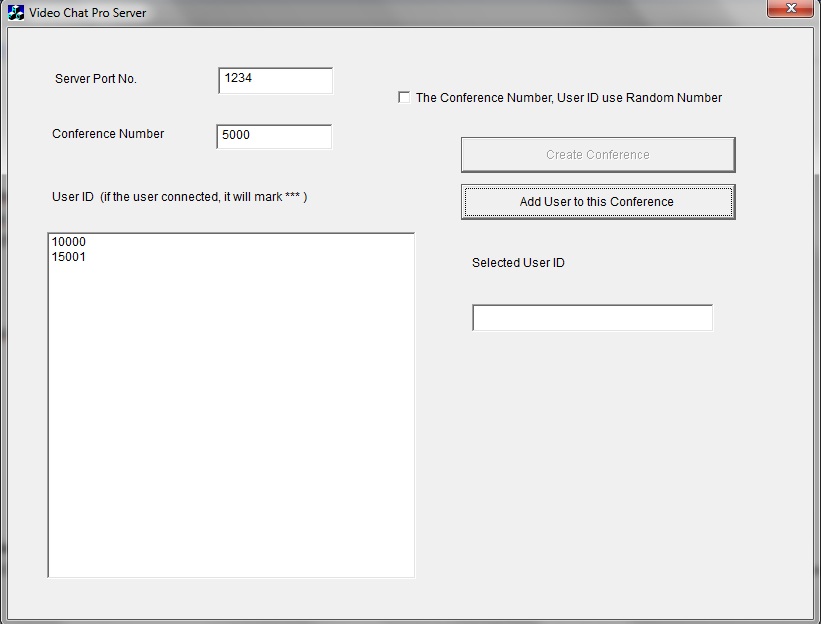
For Server
uncheck The Conference Number, User ID use Random Number.
Click Create Conference button
Click Add User to this Conference button two times.
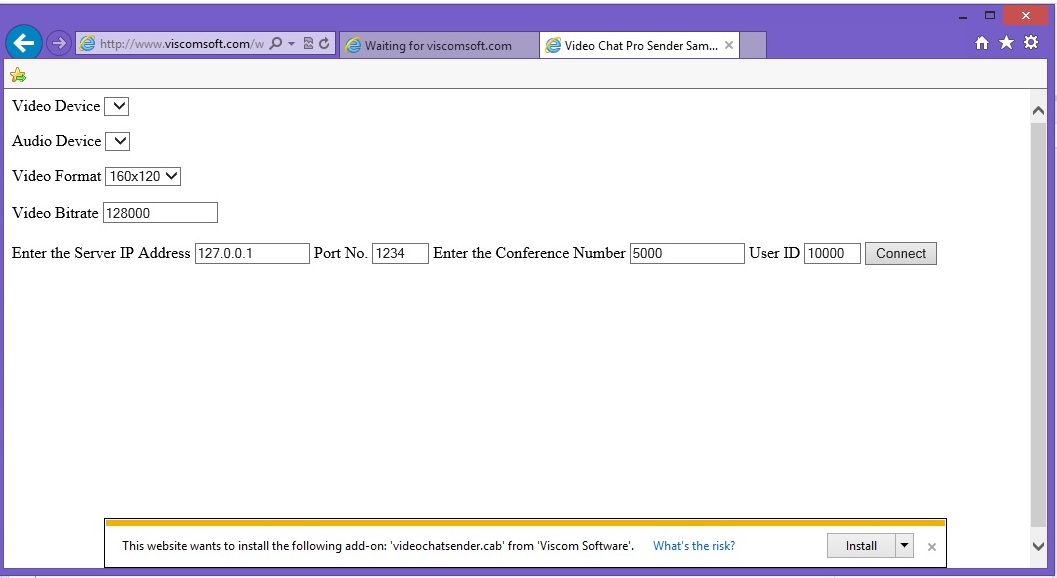
10. On Computer A, launching Internet Explorer, open sender.htm, It will prompts to installing videochatsender.cab, Click Install.
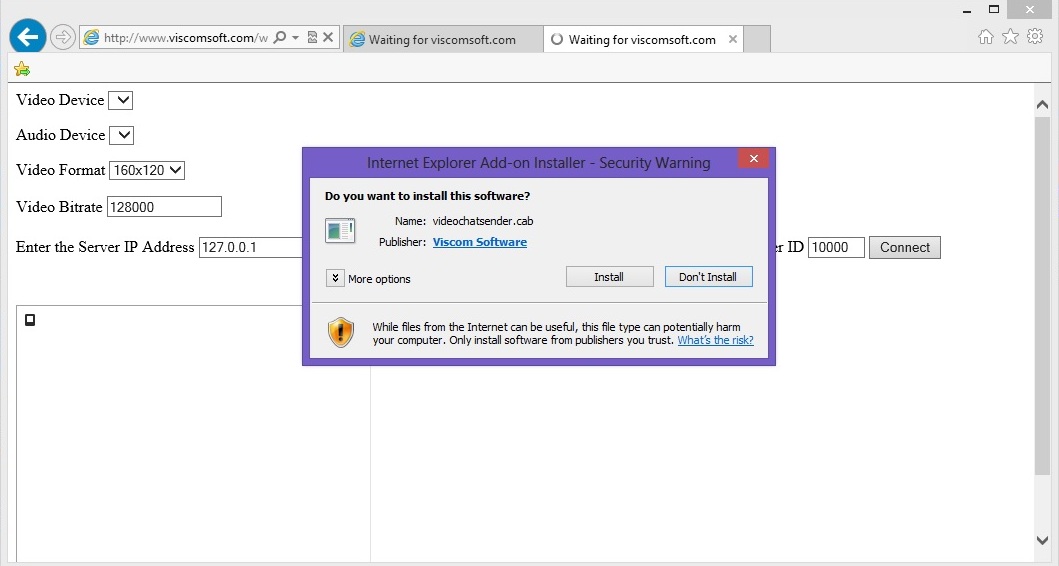
11. Next it will prompt to "Do you want to install this software?", Click Install

12.Finally you should see black color video window if the activex installed. If the IP Address of Computer C (Server) is 192.168.3.102. Enter 192.168.3.102 in Server IP , use default User ID 10000 address and click Connect. If you want to screen sharing , you may select Virtual Viscomsoft Screen Capture as Video Device. Capture part of the Screen, you need call VirtualScreenCaptureArea or VirtualScreenVideoFormat methods

13. If it is connected to server, On computer C, you should see the 10000 item mark ***, If you see 10000 item mark ***, but you cannot see the video on computer A.
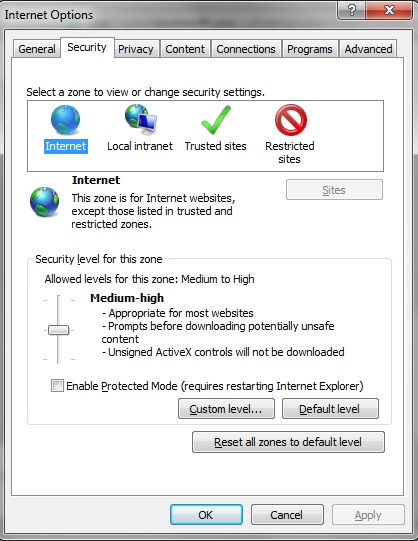
On Computer A, launching Internet Explorer, select Internet Options, select Security tab, uncheck Enable Protected Mode.Click OK and Close the Internet Explorer and do the steps 10-12 again.
14. On Computer B,launching Internet Explorer, open sender.htm, It will prompts to installing videochatsender.cab, Click Install.

15. Next it will prompt to "Do you want to install this software?", Click Install
16.Finally you should see black color video window if the activex installed. If the IP Address of Computer C (Server) is 192.168.3.102. Enter 192.168.3.102 , Enter User ID 15001
in Server IP address and click Connect.

17. If it is connected to server, On computer C, you should see the 15001 item mark ***, If you see 15001 item mark ***, but you cannot see the video on computer B.
select Internet Options, select Security tab, uncheck Enable Protected Mode.
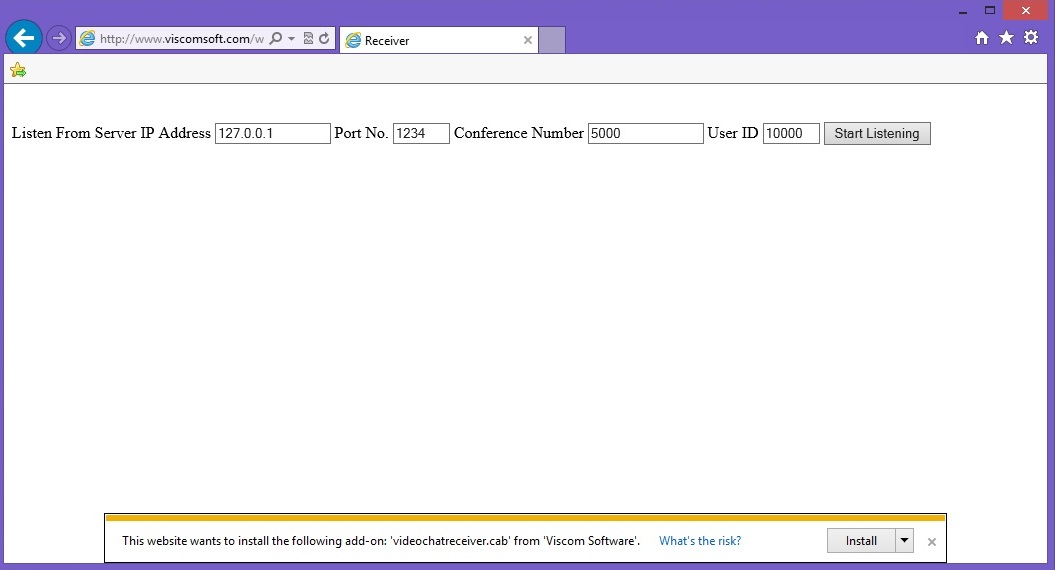
18. On Computer B, launching Internet Explorer, open receiver.htm, It will prompts to installing videochatreceiver.cab, Click Install.
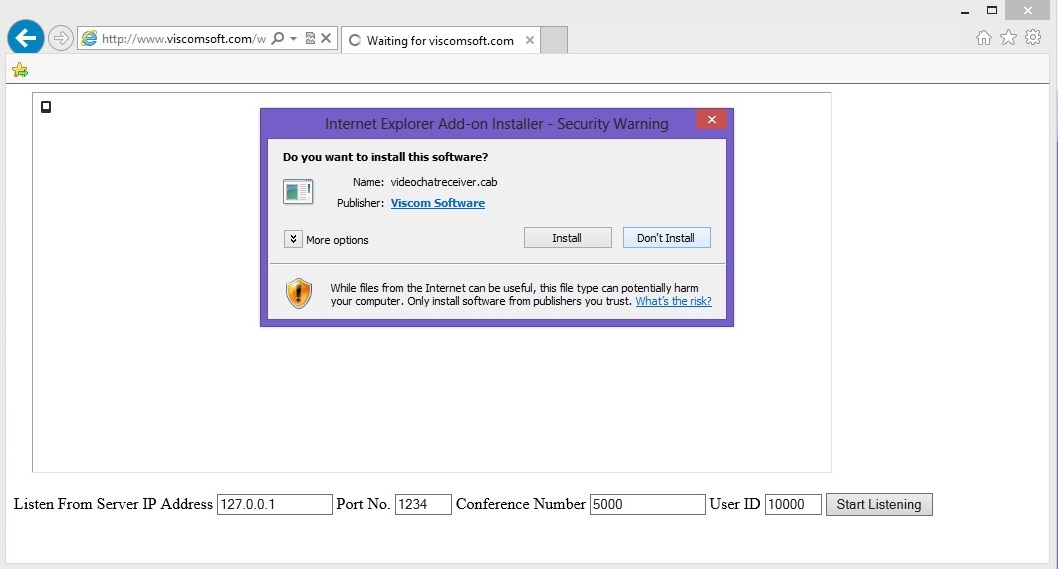
19. Next it will prompt to "Do you want to install this software?", Click Install
20.Finally you should see black color video window if the activex installed. If the IP Address of Computer C (Server) is 192.168.3.102. Enter 192.168.3.102 , Enter User ID 15001 in List From Server IP address and click Start Listening. You should see the video from Computer A.
If you double click the video, the video will zoom in , double click again, it will zoom out, right click the mouse button, it will mute the sound.

21. Now the conference room have 2 people only , You may video chat or screen sharing with 12 people in same time for each conference room.
You may online testing these web page sample from
http://www.viscomsoft.com/webdemo/videochatpro/sender.htm
http://www.viscomsoft.com/webdemo/videochatpro/receiver.htm
download the source code of web page sample from http://www.viscomsoft.com/webdemo/videochatpro/iesample.zip
|